|
| Got Mud? |
What have I been up to, lately? Training, training, training. Marathon running. Trail running. Triathlon training. Starting some exciting new projects in my personal life that I will tell everyone about when they are becoming more definite. Last weekend, though, I experienced the insanity that was the Ragnar Trail Appalachians, in West Virginia. What an experience. Crazy storm, beautiful though muddy trails, awesome people.
 |
| Team Wetsuit Legal for Confluence Running |
 |
| We wrote our team name on our arms |
Our team's start time was 2:30, and the day was gorgeous: sunny and full of promise. Two of us had arrived the night before the race so one of our tents was set up, but we spent the morning and early afternoon once the rest of the team arrived setting up our campsite, checking out the Ragnar village and applying temporary tattoos, etc.
 |
| Check out my sweet Ragnar tat |
Finally it was time for us to go listen to the safety talk and then the first runner could start! During the safety talk, he explained what would happen in the case of inclement weather. It seemed simple enough, they would postpone the race for an hour and skip the next runner. I just crossed my fingers and hoped it wouldn't happen. Finally, our first runner was ready to line up at the start. Very exciting. We all went to see our runner off and then headed back to the campsite to hang out for a while. Everything went as planned, and our first runner came in at the expected time and the exchange went exactly as planned.
 |
| Ominous clouds - that "oh crap" moment... |
During the second runner's first leg, we were hanging out by the campsite, trying to charge my phone in the car, when we noticed some ominous clouds coming up at us quickly. Suddenly lightning was flashing, thunder was rumbling, and the wind kicked into high gear while the rain came down in sheets. I watched in shock as some other teams' tents blew away, taking other tents out with them. This is when I decided to jump out of the car and take down our borrowed easy-up tent from our friends at the local running store, Confluence Running, which luckily was a pretty heavy tent and didn't blow away with the first gust. When I finally got a chance to look at our sleeping tent, I was horrified to see that the wind was blowing the side in and looking like it could potentially snap the tent poles. Let me tell you, you have not lived until you've stood in a field at the top of a mountain in a wild storm desperately grasping tent poles and trying to keep them from bowing too far while shaking from the cold. By the time the storm had let up to just a steady deluge of rain, the entire camping area was completely trashed. People were trying to put things back together in the rain or just staring, dumbfounded, at the carnage. Five of us climbed into my pontiac vibe to ride out the rain, while making ridiculous jokes about the devil coming straight out of the sky to blow away our tents and laughing hysterically at the situation.
 |
| Waiting out the rain in my tiny car |
Thankfully, our runner wasn't in the woods in the storm for too terribly long, and made it back safe. Meantime, the Ragnar people handed her the obligatory postponement card when she returned, putting off the race for an hour and skipping our next runner. Ultimately, they ended up skipping the next hour and 4th runner, as well. At this point, we were all chilled to the bone from the rain and the drastic temperature drop brought by the storm, so we decided to make use of the hot food offered at the free dinner - spaghetti and rolls and salad. It's amazing how some mediocre-tasting but hot food can feel like such a blessing in these conditions.
 |
| Stuffing our faces because: warm |
 |
| Hanging out in the relative dryness of the merchandise tent. So.cold. |
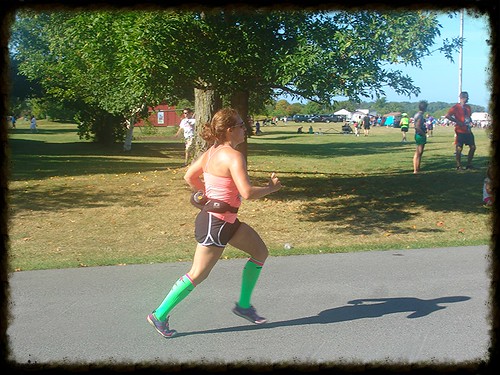
After the storm passed, the race started back up again, having skipped two runners. The skipping of the runners actually worked in our favor in terms of time because Ragnar just uses the average team pace to calculate those skipped legs, and our skipped runners were slower than the average pace, generally. It didn't much matter, though, because after the torrential rains, the trails were basically composed of total muck. Think mud 6 inches deep, when it wasn't just standing water. Now realize, this race had 1000 teams of 8 runners. That's a LOT of feet going over trails that are a total disaster, churning them to the point of being about the texture of a thick milkshake. Needless to say, was pretty slow going. A total slog. We had two more runners to run before it would be dark and the going would be even slower.
 |
| The trails |
As runner #8 (the last runner), I was "lucky" enough to be the first one to run in the dark. In the slushy-mud trails. In mountain lion territory (I went in being nervous about the possibility for an encounter with wildlife). On friday the 13th... and a full moon. I was slated to run the yellow loop. I put on my headlamp, grabbed a hand-held flashlight and nervously waited in the exchange area for my teammate to come through. The light was still waning when I headed out but the moment I got into the woods, it was clear that I needed my lights on immediately. About a minute and a half into my run, the fog became so thick you could barely see anything and the headlamp just made the air into a wall of white. Every breath out just added to the fuzzy visibility. I was so glad I brought my hand-held flashlight as well, because using that to spotlight rocks is what made it possible to run at all through that fog. I'm a little disappointed that I didn't get to see much of that trail (fog too thick, trail too technical and required too much concentration). At one point I ran past ferns that came up to my shoulder. It really felt magical, at the time, despite my fears of encountering a bear or mountain lion. The mud and fog made the going pretty slow, but I was still hitting a pretty good pace (around 10 min/mile) and ended up finishing the loop ahead of my projected pace and blowing by a ton of people who were stuck just walking because of their lack of light or whatever. When I got back to the Ragnar village, I immediately told my teammates to take their time because I had no need to have another run in the dark, but later I started to feel like it was kind of awesome, though it would have been more fun (and less terrifying) if I had been running with my friends who have been doing the night trail run training with me.
 |
| My poor trail shoes |
After that, we had expected a lot of down time again, as we went through the cycle of runners one last time. Unfortunately, the Ragnar people decided that too many of the teams were too far behind schedule because of the lousy trail conditions and they were telling us that we needed to have our final runner out on the trails by 4pm or risk a DNF (did not finish). They told us that if we were not likely to have that happen, we would have to double up and since there was only one race bib, the doubled up runners would have to finish the leg together. So, for the last leg (the longest one) I ended up running with a teammate. It was a lot of fun! The trail was technical, but GORGEOUS and running it with a friend made the experience that much more enjoyable. By this time, the trails had dried up, for the most part, though there were still some fairly slushy areas, and it was just a lovely fun trot through the woods. We pushed hard at the end, through the very mucky last mile, and I think the elevation difference from home (about 2000 ft higher there) made the running more difficult, but my final experience with the Ragnar Trail was that it was an awesome though exhausting experience.
My overall takeaway from the Ragnar Trail Relay is that it was fun and physically challenging, but there was at least as much mental challenge (from lack of sleep, and grueling runs through the darkness and the mud). During the race I kept thinking "ugh, why do I do this to myself? I hate relays." but just like always, afterwards all I can think about is when I can do it again!
I'd like to give special thanks to our local running store, Confluence Running, for loaning us the tent that kept us dry and shaded during the race. It really made our race experience that much better. If you're ever in Binghamton, NY, stop by and check them out! It's one of my favorite places to go.